
Have you ever wondered how to use a multimeter but felt intimidated by the various functions and settings? Fear not, as we have prepared a comprehensive guide to help you understand the multimeter and its uses. Whether you are a beginner or an experienced DIY enthusiast, this article will provide you with step-by-step instructions on using a multimeter effectively. Furthermore, we will also cover important safety precautions to ensure that you use a multimeter without any risk.
Main Points:
- Understanding the basic functions of a multimeter
- Measuring voltage, current, and resistance with a multimeter
- Using a multimeter safely
- Practical tips for multimeter usage
Understanding the Functions and Settings of a Multimeter
When it comes to electrical work, a multimeter is an essential tool for both professionals and hobbyists. However, understanding how to use a multimeter and its various settings can be daunting for beginners. In this multimeter tutorial, we will provide a comprehensive guide on measuring with multimeter and utilizing its functions.
How to Use Multimeter:
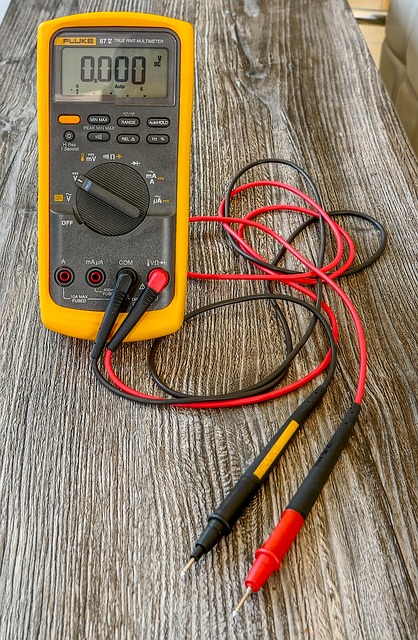
- Set the dial: Begin by setting the dial to the appropriate function, such as voltage, current, or resistance.
- Connect the leads: Ensure the red lead is inserted into the port marked for positive readings, while the black lead goes into the negative port.
- Take the measurement: Place the probes on the circuit or component you want to measure and read the display for the corresponding value.
Safety Precautions When Using a Multimeter
When using a digital multimeter, it is crucial to take certain safety precautions to prevent accidents and ensure accurate readings. Follow these multimeter usage tips to safely operate the device:
1. Inspect the Multimeter
Before use, check the multimeter for any visible damage or exposed wiring. Do not use a damaged multimeter as it can pose a safety hazard.
2. Use the Correct Settings
Ensure that the multimeter is set to the correct function and range for the measurement being taken. Using the wrong settings can damage the multimeter or result in inaccurate readings.
3. Avoid High Voltage Measurements
Unless properly trained and equipped, avoid measuring high voltages with a multimeter. High voltage measurements should be left to professionals to prevent electrical hazards.
4. Disconnect Power Sources
Before making any measurements, always disconnect the power source from the circuit being tested to avoid electrical shock or damage to the multimeter.
5. Use Proper Personal Protective Equipment
Wear insulated gloves and eye protection when working with electrical circuits to prevent injury in case of accidental contact or an electrical fault.
| Safety Precautions | Importance |
|---|---|
| Inspect the Multimeter | To prevent safety hazards |
| Use the Correct Settings | To avoid damage and inaccurate readings |
| Avoid High Voltage Measurements | To prevent electrical hazards |
| Disconnect Power Sources | To avoid electrical shock |
| Use Proper PPE | To prevent injury |
Measuring Voltage and Current with a Multimeter
When it comes to measuring voltage and current with a multimeter, it’s essential to do so safely and accurately. By following the correct procedures and safety measures, you can ensure that you get the most reliable results without putting yourself at risk.
One of the key considerations when using a multimeter is to ensure that it is set to the correct function, whether it’s for measuring voltage, current, or resistance. Additionally, it’s crucial to select the appropriate range to avoid damaging the multimeter or getting inaccurate readings.
Another important factor to consider is the safety precautions that need to be taken when working with electricity. Always make sure to use insulated test leads and keep your hands away from the metal probes when the multimeter is connected to a circuit. Safety should always be the top priority when working with electrical circuits, and using a multimeter is no exception.
Testing Continuity and Resistance Using a Multimeter
When working with electrical circuits, it is important to ensure continuity and resistance to prevent any potential hazards. A multimeter is a versatile tool that can be used to test these parameters accurately. Here’s how you can use a multimeter to test continuity and resistance:
Testing Continuity:
- Set your multimeter to the continuity setting. This is usually denoted by a symbol that looks like a sound wave or a Wi-Fi signal.
- Touch the two leads of the multimeter together. If the multimeter emits a beeping sound or shows 0 resistance, it means there is continuity, indicating a complete path for the current to flow.
- Place one lead of the multimeter on one end of the circuit and the other lead on the opposite end. If there is continuity, the multimeter will beep or show 0 resistance.
Testing Resistance:
- Set your multimeter to the resistance setting. This is usually denoted by the Greek letter omega (Ω).
- Place the leads of the multimeter on either end of the component or circuit you want to test. The multimeter will display the resistance value in ohms.
- If the resistance reading is within the expected range, it means the component or circuit is functioning properly. A higher or lower resistance reading may indicate a fault.
By regularly testing continuity and resistance using a multimeter, you can ensure the safety and efficiency of your electrical circuits. Remember to always handle the multimeter with care and follow proper safety procedures when working with electricity.
Troubleshooting with a Multimeter
When it comes to troubleshooting electrical issues, a multimeter is an essential tool for any technician. With its ability to measure voltage, current, and resistance, a multimeter can quickly identify faults in a circuit. To effectively use a multimeter for troubleshooting, start by setting the dial to the appropriate function, whether it be voltage, resistance, or current. Then, carefully place the probes on the component being tested, ensuring a secure connection. Finally, interpret the readings on the display to determine the issue at hand. Using a multimeter properly and accurately can save time and effort in diagnosing electrical problems.
Common Issues and Solutions Using a Multimeter
One common issue that can be diagnosed using a multimeter is a faulty fuse. By setting the multimeter to the resistance function and testing the continuity of the fuse, you can determine if it is blown or intact. Another common issue is a short circuit, which can be identified by measuring the resistance between two points in a circuit. By using a multimeter correctly, these common issues can be quickly identified and resolved.
Frequently Asked Questions
How do I use a multimeter to measure voltage?
Set the multimeter dial to the voltage (V) setting, connect the probes to the circuit or component you want to measure, and read the voltage value on the display.
How do I use a multimeter to measure current?
Set the multimeter to the current (A) setting, break the circuit and connect the multimeter in series, then read the current value on the display.
How do I use a multimeter to measure resistance?
Set the multimeter to the resistance (Ω) setting, disconnect the component from the circuit, connect the probes to the component, and read the resistance value on the display.
How do I use a multimeter to test continuity?
Set the multimeter to the continuity setting (usually denoted by a sound wave symbol), touch the probes together to verify the multimeter beeps, then use the probes to test for continuity in a circuit.
Can I use a multimeter to test diodes and transistors?
Yes, set the multimeter to the diode or transistor testing mode, follow the manufacturer’s instructions for the specific component, and use the multimeter to test for proper function.